The Hello World Tutorial
Without doubt, the obligatory Hello World tutorial is required when
introducing a new concept in programming. This is our contribution to the
collective. In this tutorial, we will show you how to set up a very simple
application that uses JOGL for the rendering of OpenGL calls. What you will
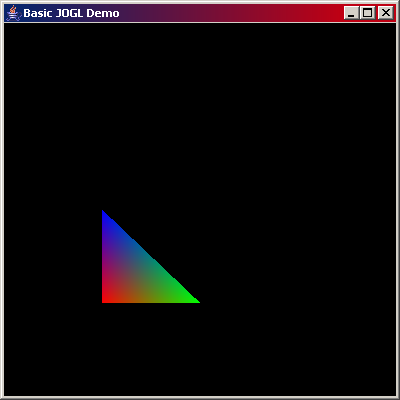
get on screen is a simple coloured triangle. No animation, no navigation, just
a basic framework.
We're assuming that you already have JOGL installed by this point and can
run the demo applications that come with it. If you do not have it installed,
please wander to the JOGL Installation page
and follow those instructions first.
Source and Class file ZIP
Basic Window Setup
The first stage in setting up any 3D graphics application is the basic
framework of getting from the main() method to a window on screen.
No doubt you've seen this countless times before, but there's a few little
tricks to dealing with JOGL that you need to be aware of.
We need a frame of some description. We'll start with a standard AWT
Frame though you could use the Swing equivalent if you wanted to
(IBM's SWT toolkit is not supported by JOGL yet).
public class HelloWorldDemo extends Frame {

    public HelloWorldDemo() {
        super("Basic JOGL Demo");

        setLayout(new BorderLayout());
        addWindowListener(this);

        setSize(600, 600);
        setLocation(40, 40);

        setVisible(true);

        setupJOGL();
    }

    public static void main(String[] args) {
        HelloWorldDemo demo = new HelloWorldDemo();
        demo.setVisible(true);
    }
}
|
In the constructor, we do the usual collection of window size and location
setting, layout managers etc. There's a method to go set up our basic JOGL
bits and pieces, we'll cover that shortly.
The one key aspect to note here is the ordering of the various calls. Note
that the constructor contains a setVisible(true) call before
it wanders off to set up the JOGL pieces. This is deliberate. JOGL
Issue 54
describes part of the problem - if you add the JOGL canvas to the window before
it is already set to be visible, then all sorts of internal state gets messed
up and things break. This is magnified once you get to more advanced setups
where you want to control your own rendering thread etc.
Creating a place for JOGL to render
Now that you have a basic window showing on screen, you need the second step:
fill in the details of the setupJOGL() method. In this method, you
create the on-screen drawable that JOGL is going to use, known as a
GLCanvas, and place it on the screen.
Creating a canvas for OpenGL to render to is a little more complex that
creating your standard AWT or Swing widget. Because OpenGL can render to a
multitude of different device types, you can completely control the basic
properties of how it is rendered. For example, if you wanted to only render
red pixels, you can set the screen up to do so. If you want to turn hardware
acceleration off, you can etc etc. All of this configuration information is
contained in a class called GLCapabilities. Once you have set up
the capabilities of the renderer that you desire, you then create a canvas
instance using those.
Putting this all into practice, you need to start by creating an instance
of GLCapabilities, and tell it what you need. In this example,
we want to make sure that we are hardware accelarated, and that the rendering
is double-buffered (ie everything gets drawn to a background buffer, and once
complete it swaps it to the front of the screen in one fell swoop).
private void setupJOGL(){
    GLCapabilities caps = new GLCapabilities();
    caps.setDoubleBuffered(true);
    caps.setHardwareAccelerated(true);
}
|
Creating a GLCanvas is a simple matter of just calling the
constructor on the object with a set of options. Rarely will calling the
default construtor be of use to you. As you see we've just created a
GLCapabilities, so we will want to use the constructor that
takes it as a parameter. There are other options that will allow you to
use multiple canvases at once, but we won't cover that in this basic
introduction.
You will also see in the API that there is a Swing GLJPanel
class that gives you lightweight rendering. However tempting it may be to use
this, we strongly discourage it as the performance is horrible unless you are
using JDK 1.6 with the OpenGL accelarated rendering. JOGL can only
use software rendering to render to it, and then it must also deal with the
rather archane Swing repaint mechanisms. All of this means you go from having
100+ FPS down to 2-3FPS, so you really do want to avoid it, even if the rest
of your application uses Swing.
Finishing off the setupJOGL() method is the following piece of
code:
    GLCanvas canvas = new GLCanvas(caps);
    canvas.addGLEventListener(this);

    add(canvas, BorderLayout.CENTER);
|
Only one more piece needs explaining, and that's the
addGLEventListener() method call being made. We'll cover that
shortly, but for now, it is the way that OpenGL communicates to our code when
it is the proper time to issue GL calls.
Issuing GL calls
In Java, unless the methods are in the same class as you, there is no
ability to make straight, unadorned function calls like you can in C. Since
OpenGL is normally treated as just a series of external function calls, the
Java equivalent has to wrap them up into a class-like structure. In the JOGL
world-view, that is a single interface named GL. This is a
huuuuge interface with every single GL method known to man, and then some.
We're talking several thousand method definitions here, not some lightweight
of 20 or 30. Every function known to the standard C programmer is defined here,
though whether they are available to your runtime environment or not is another
matter. (for reference, LWJGL uses a layered interface approach that breaks
each GL version into separate interfaces extending from a common base, as well
as each set of vendor extensions. A far more sane design in our opinion).
To fetch an instance of the GL interface, you need to call the
getGL() method on GLDrawable - which is the interface
that your GLCanvas happens to implement. Very handy. Once you have
an instance of GL don't keep it around. Like our C/C++ brethren,
that GL class represents a GLContext, which the underlying operating system is
likely to change on you at any time. You should fetch the instance every time
you need it and then let go of it as soon as you're done with it. If you keep
it around in a class variable, you're likely to have intermittent problems that
may be impossible to debug (eg it suddenly stops rendering).
Connecting the Canvas to rendering
Knowing when is the "Right Time" to make GL calls is a fairly
simple matter - you can only make the calls during one of the callbacks
defined by GLEventListener. If you make a call to the GL interface
at any other time, an exception will be generated. The
GLEventListener interface acts in a way that is almost identical
to the GLUT function callbacks that you may have seen in C examples. All of the
state needed to deal with OpenGL is managed for you, and all you need to do is
make your GL drawing calls.
Remember back to a few sections ago where we added the event listener to
the canvas? Well that is how we connect our application into this feedback
cycle. Head back up to the start of your class and make sure you add an
implements line for the GLEventListener interface and then
stub the methods required like this:
public class HelloWorldDemo extends Frame
    implements GLEventListener {

    ...

    public void init(GLAutoDrawable drawable) {
    }

    public void reshape(GLAutoDrawable drawable,
                        int x,
                        int y,
                        int width,
                        int height) {
    }

    public void displayChanged(GLAutoDrawable drawable,
                               boolean modeChanged,
                               boolean deviceChanged) {
    }

    public void display(GLAutoDrawable drawable) {
    }
}
|
For now, the method that is of interest to you is display().
This is the method that is called every time OpenGL decides that you need to
repaint your graphics. Notice how the method hands you an instance of
GLAutoDrawable, which is the surface that you registered the listener
for in the first place. When you get this callback, you can fetch the
GL context that you need to draw with and start making drawing
calls.
An example of making these drawing calls is the simple coloured triangle
that you are familiar with from other OpenGL demos
public void display(GLAutoDrawable drawable) {
    GL gl = drawable.getGL();

    gl.glClear(GL.GL_COLOR_BUFFER_BIT);
    gl.glBegin(GL.GL_TRIANGLES);

    gl.glColor3f(1, 0, 0);
    gl.glVertex3f(0.25f, 0.25f, 0);

    gl.glColor3f(0, 1, 0);
    gl.glVertex3f(0.5f, 0.25f, 0);

    gl.glColor3f(0, 0, 1);
    gl.glVertex3f(0.25f, 0.5f, 0);

    gl.glEnd();
    gl.glFlush();
}
|
In addition to the basic display method, it is always advisable to set up
your basic view information, as well as setting the background colour.
Typically this is done in the init() method with something along
the lines of this code:
public void init(GLAutoDrawable drawable) {
    GL gl = drawable.getGL();

    gl.glClearColor(0, 0, 0, 0);
    gl.glMatrixMode(GL.GL_PROJECTION);
    gl.glLoadIdentity();
    gl.glOrtho(0, 1, 0, 1, -1, 1);
}
|
Making it all run
If you had taken all the code up to this point, compiled and ran it, you
are going to see a blank white area on the screen. This is because OpenGL won't
just do all the repainting by itself. If you've looked at C code, you will have
noticed that there is typically a call to a function named
glutMainLoop(). What this does is create an internal thread that
will loop forever, instructing OpenGL to repaint itself. We need the equivalent
of that in our Java code. If you put a couple of printlns into the above code,
you will have noticed that they never get printed out - the
display() method is not being called. We need something to force
OpenGL to repaint the screen, and thus call our code.
Luckily, there is a nice convenience class in JOGL to do that for us - it's
name is Animator. Making use of it is as simple as a 2 line
addition to the end of our setupJOGL() method that looks like
this:
    ...
    add(canvas, BorderLayout.CENTER);

    Animator anim = new Animator(canvas);
    anim.start();
|
That's all there is to it. This will now create a thread that will
continuously ping OpenGL and force it to render as often as possible. Now, when
you compile and run the code, you should see this nice pretty picture:
|